Tuesday 26 January 2016

Front End Pt2

Having been stuck waiting for parts, they began to come through. As a result the headlights are on; quite a tricky job, due to the wires, shape of the mounts and the bolt through the wishbone, chassis and headlight mount.
Looks good with some "eyes" now
With the arrival of the bolts for the dampers they were installed. Again the upper bolt for the dampers requires a great deal of patience, as access is somewhat of a challenge.
Dampers installed
But alas that is where the progress on the front corners has ceased. I have no upright assemblies, and Caterham have informed me it will be at least another week!

In the meantime, I have moved on to the engine and gearbox, which is now all bolted together ready to go in the car.
Ready to go!
The engine bay is also (nearly) ready for the engine, with the engine mounts installed, washer bottle and horns installed. Unfortunately when installing the LHS engine mount Caterham had drilled holes in the chassis but not through the external bodywork, so I found myself drilling holes in the bodywork. Roll on the weekend and an engine crane!
RH engine mount
LH engine mount and washer bottle
Another aspect I had a little look at was the handbrake, having got some missing items. All was going swimmingly until I came to bolt the handbrake assembly to the chassis. The front bolt went in ok, but the rear bolt holes in the pre-installed brackets aren't even remotely close to lining up. Pending further investigation...
Pretty unclear photo, but it's hard to get into the transmission tunnel! Basically the bolt holes are so misaligned the bolt will not go in, even without the handbrake assembly in the middle

Thursday 21 January 2016

Front end

n line with the Caterham build guide I started at the front end the car. Prior to commencing any "true" build tasks, I followed the advice given in Andrew Bissell's blog, which was to start with the IVA trim around all the openings in the bodywork. I followed a similar technique, by cutting V shapes in the back of the IVA trim where it was necessary to fit around some of the front suspension supports. On the whole this seemed to go pretty well, although it was quite a fiddly little job, but, with the help of a few plastic golf tees (used to shape and support the rubber trim) it's all in place. Considering the fact it was so fiddly, I am glad I did not leave this until the end!
All nicely siliconed in place
Following the IVA trim was the initial fitting of the steering arm (with IVA trim), which was a nice straightforward job to start with and a good introduction to the Caterham system of fastener packs and how the instructions were going to refer to the content.

The lower wishbones were  assembled several times with a few different washer arrangements to get a good fit and spacing, before finally being torqued up; this is definitely easier as a two man job. For the upper wishbones the rear bolt was inserted and tightened, while the front bolt opened a new avenue - front lighting!

Since the front headlight mount needs to be installed prior to the front bolt of the upper wishbone, it is advised that the headlights be assembled. Cue the return of the horrible IVA trim tat was required on the indicator cones. Eventually, I gave up with silicone and superglued the trim in place; this worked much better. as for the rest of the assembly, it was pretty painless, if a little fiddly and required a new hole drilling (the Caterham pre-drilled holes were miles off!). Unfortunately, I then realised I could not put this on the car, due to a lack of rubber grommets to protect the cables.

This turned out to be the start of a bit of a trend... I went on to try and fit the dampers only to find that the bolts that should be in the chassis, were absent. Undeterred, I looked for the uprights and brake callipers to ensure they were assembled, alas none were to be found...

That pretty much sums up the front end at the minute - stuck, with a lack of parts...


Thursday 14 January 2016

It's Arrived!

After many months of waiting the kit has arrived!


 There is something strangely satisfying about seeing so many boxes and car bits with your name on them!


More good news, it fits nicely in the garage.

Opening all the boxes was like Christmas morning all over again! I have sorted and organised the boxes into what seemed like a logical placement and order, but who knows. I'm pretty happy with all the bits that have arrived, although I haven't seen any wing-mirrors yet... Who needs to see behind anyway!

Job one as many others have suggested was a good bit of rust protection. For me this involved a Dinitrol 3125 for the engine bay, with special attention given to the "grot traps" and at the rear around and behind the fuel tank. This was followed by Dinitrol 4941 for the general underbody. Not the most fn job to start with but an important task. I am still debating making some infill pieces to block off the grot traps, any thoughts?

Sunday 10 January 2016

Getting Close!

Well, I have a delivery date!!! On the thirteenth of January I will take delivery of my kit! To say I am excited would be a huge understatement!

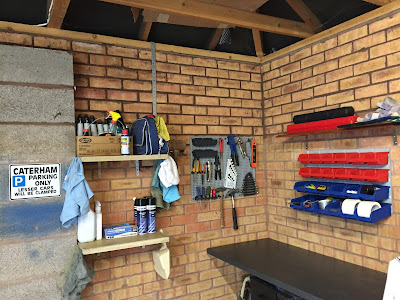
6 months ago the garage was a total mess; a double garage rammed with so much stuff that you could barely get one car in! Sadly I don't have a "before" picture, but the "after" is such a big improvement! The garage clean-up has dominated the past few months, involving multiple new shelves, a new workbench, sealing the concrete floor and new lights. Hopefully the end result is a space ideal for building a Caterham, despite the clutter my Mum insists we keep (note the rocking chair covered in white sheet - right pain in the arse).

 Ignore the wet footprints!

A nice tidy, organised corner!